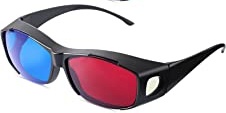
Yes, it is an art form. The idea is to take a 2D photo and give it depth the way our brains picture it. Before we get into the art, let’s delve into a little bit of history. (Anaglyph glasses will make viewing the stereo images easier. These glasses have a red filtered lens over the left eye and a cyan filtered lens over the right eye as seen below).
Once there was a microorganism that could sense light. Too far back? Okay, a guy by the name of Sir Charles Wheatstone figured out in 1832 that if you took two photos a few inches apart, they could be seen individually by our eyes and duplicate stereo vision. He invented an optical device to view the results. Called a stereoscope, it allowed each eye to view a separate image. Unfortunately, photography hadn’t evolved very far and the daguerreotypes and calotypes were not sharp enough to render satisfactory results.
In the late 1840’s another Sir, Sir David Brewster made a device that used two lenses 2 ½ inches apart and faced into a little tapered box. There were doors on the sides to let in light. The twin images were put into a slot in the bottom at the far end. The bottom was also made of frosted glass to let in more light.
At the great Exposition of 1851, Queen Victoria fell in love with it. That led to every British subject to follow suit. A quarter million were sold with over a million prints. An industry was born. Soon photographers were sent around the world to capture a wide variety of locations.
The little box caused headaches so Sir Oliver Wendall Holmes and Joseph L. Bates developed the handheld stereoscope viewer. Its popularity lasted until the late 1870’s.

Fast forward to the 1920’s. The Keystone View Company developed the View Master 3D which was popular for many decades. Here is mine.
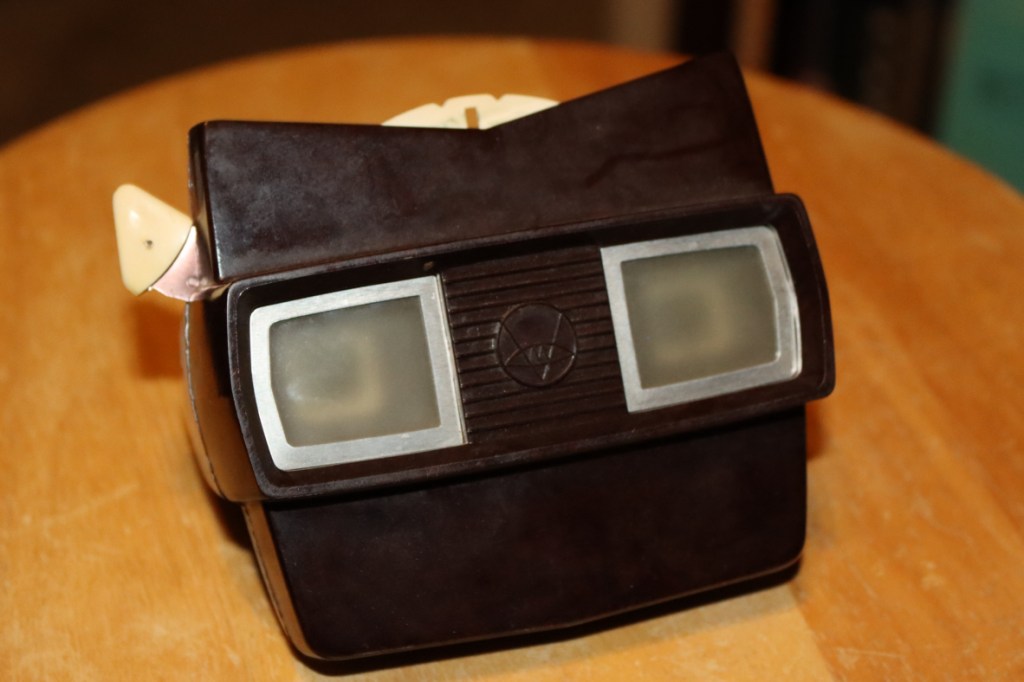
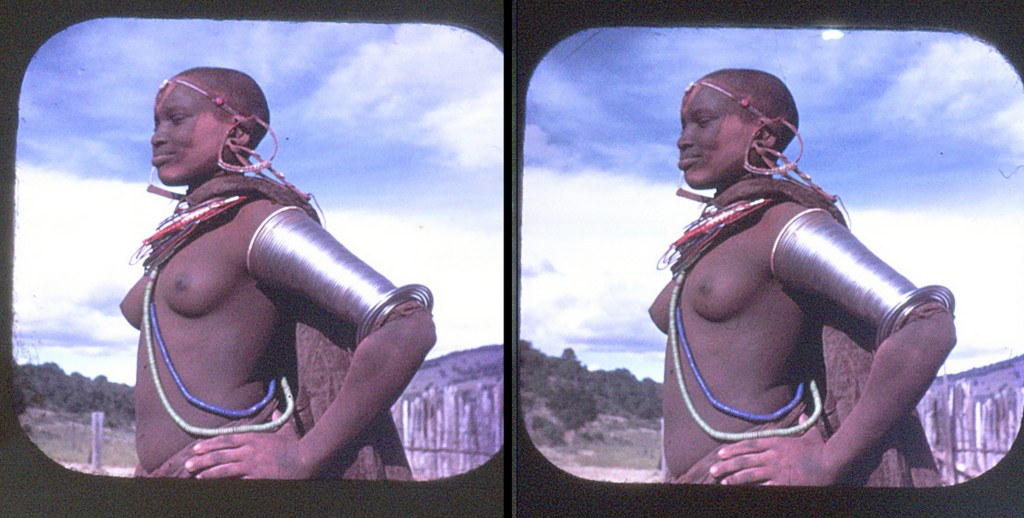
These used small discs with tiny images that the twin lens were focused on. The results were surprisingly effective. Note: The fallowing stereo images can be viewed as a stereo pair or with 3D anaglyph glasses (red lens over the left eye). More on how to view 3D images later.
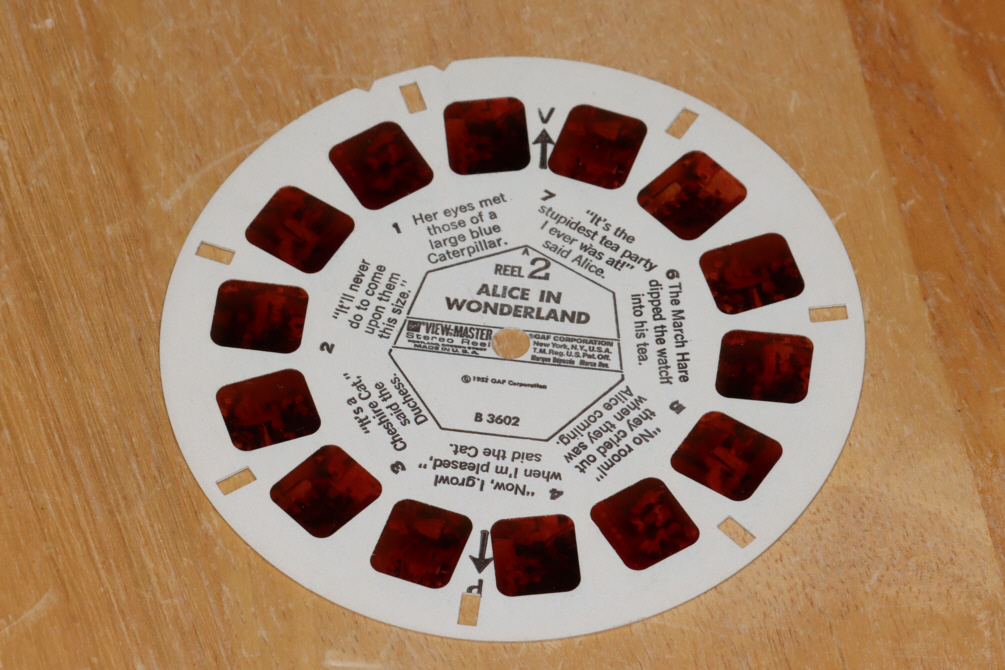
My favorite discs were Marineland and…

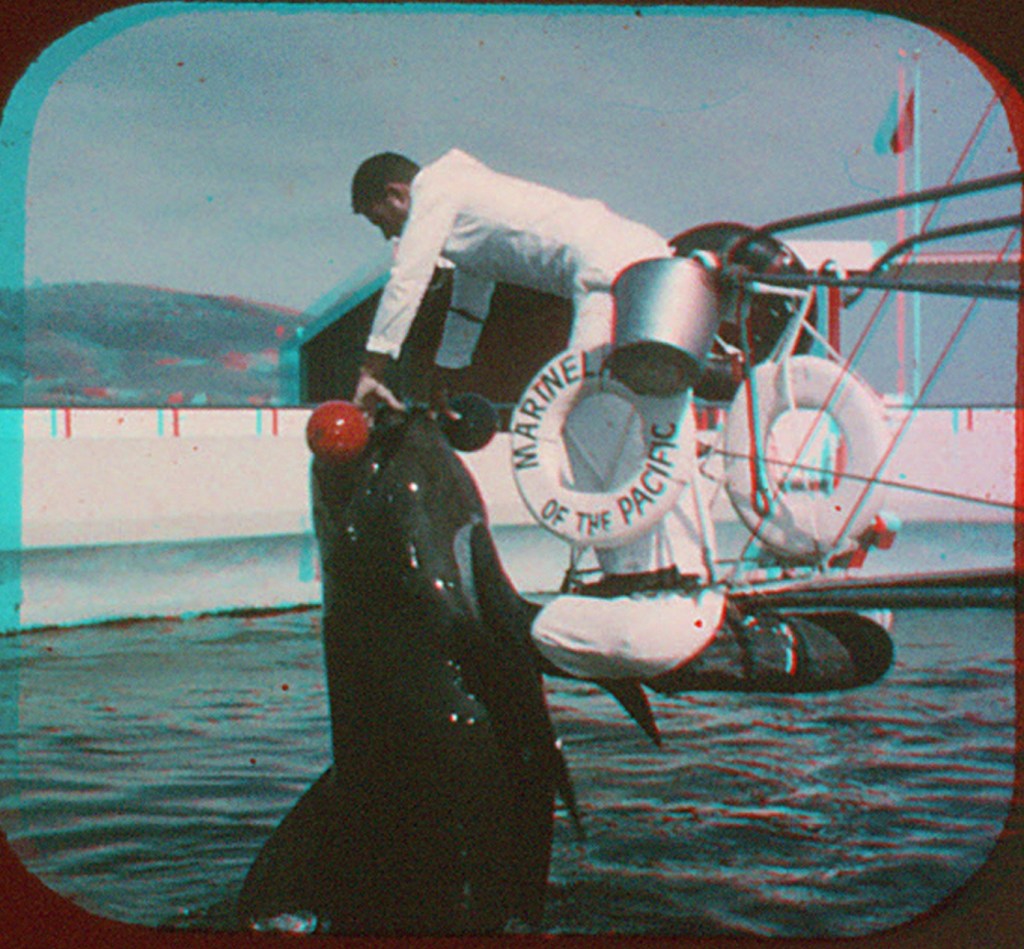
Can you think of any reasons why I liked this one when I was 10 years old? I can think of two…

How to Take 3D Images
Enough of that! My first attempts at 3D came in 1978 or 9 when Dad and I bought a Pentax 3D adapter for a lens with a 52 mm filter size. Not sure what my first one was but it may have been this trip to the Grand Tetons and Yellowstone…

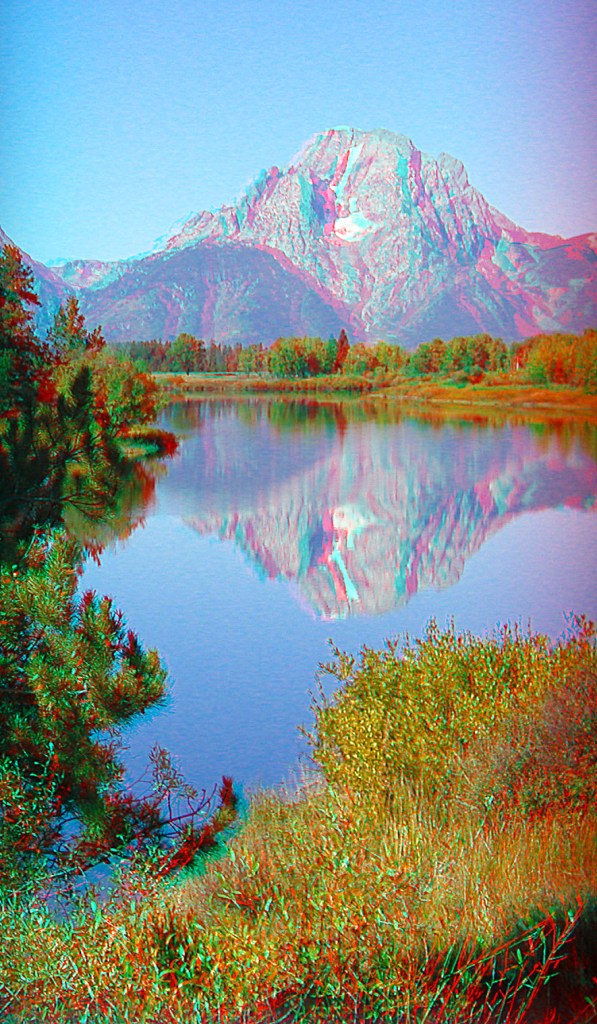
The Pentax adapter allowed you to take your two images simultaneously. You had to take your images as slides and put the developed slides into a viewer. What if you did not have the two hundred dollars at the time or wanted one today? No such luck. They quit making them about thirty years ago or more. Ebay? Yes, they are still available on Ebay.
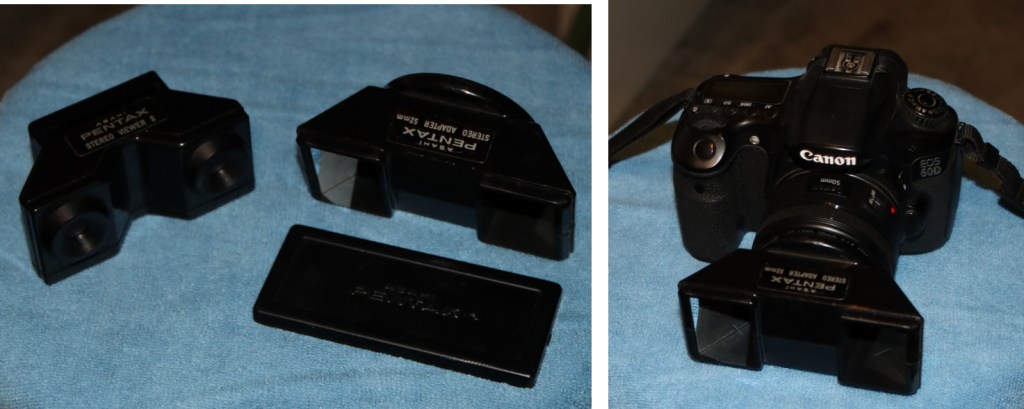
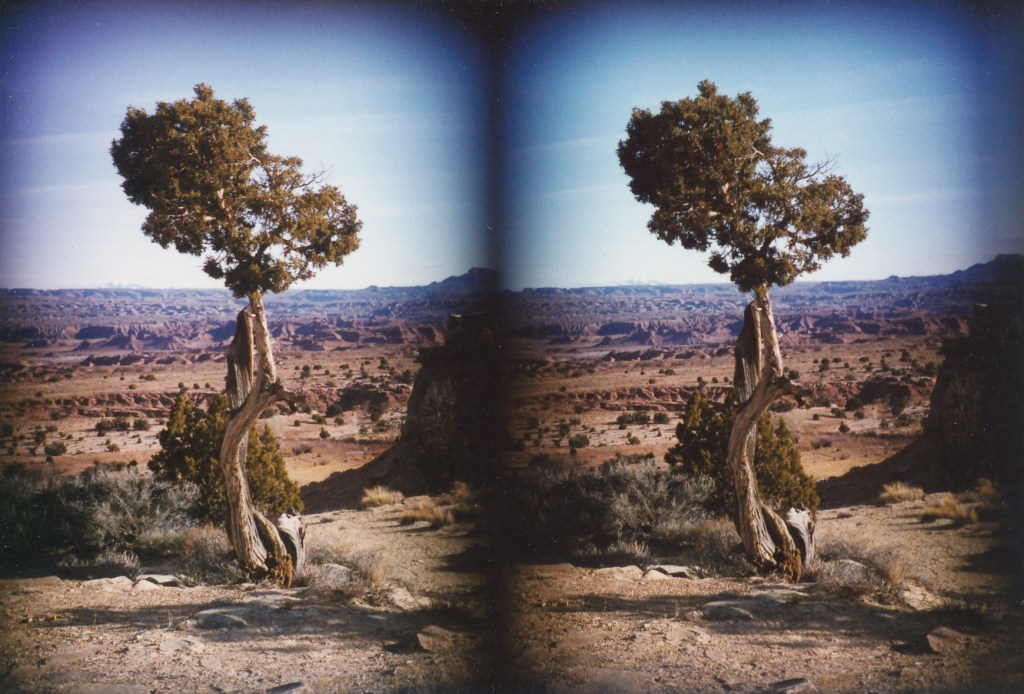
It still is in excellent condition but does not work on APSC DSLR’s. Imager is too small. The mirrors are aimed to project the images into the camera for a 35mm slide. APSC imagers are about two thirds that size. It sure worked well on slides as this image of a tree demonstrates.

Back in the late 90’s, I thought about taking 3D astrophotos. Wouldn’t Jupiter look cool as a 3D image? How about the craters of the Moon? First I had to practice 3D with one camera. How do you easily slide a camera about 2 ½ inches? I looked around and finally found a flash bracket that allowed you to slide the flash away from the camera depending on how big your camera was. It kept the camera level which was paramount. Next, I found the camera needed to be aimed at a spot at least six feet away. This is actually called “parallax.” Seeing a single subject from two different angles is called parallax. If the two images were aimed at a spot a few feet away, the background was so offset that the image was unusable. If the images were aimed at infinity, any close subjects were too hard to merge into one 3D image. You can do the same thing with a level surface and slide the camera over about 2 1/2 inches.
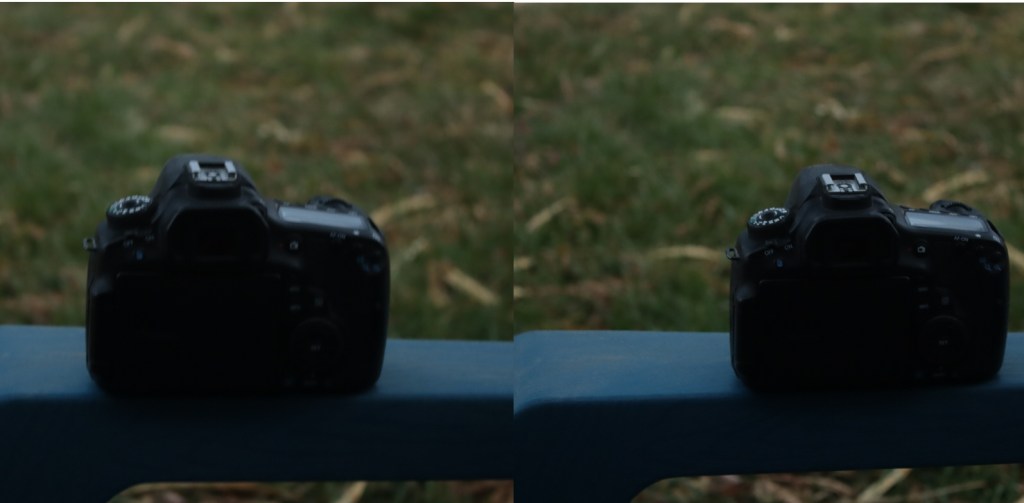
I practiced a LOT! Eventually I learned a different technique. It was a matter of necessity. While off somewhere in the mountains, far away from my bracket, I wanted to take a stereo image. What I figured out was if I kept my head perfectly still and then framed one image while looking through the finder with one eye, took a photo, then moved the camera over to the other eye and focused on the same spot, usually about six to ten feet away.

If it was a scenic image, I might find some rock or bush or even a cloud and lined it up with a mark on the finder screen. Below is an example of one of these instances. It was in 2014 near Kebler Pass. These aspens were so crooked and spread out I thought they would make a fantastic 3D image.
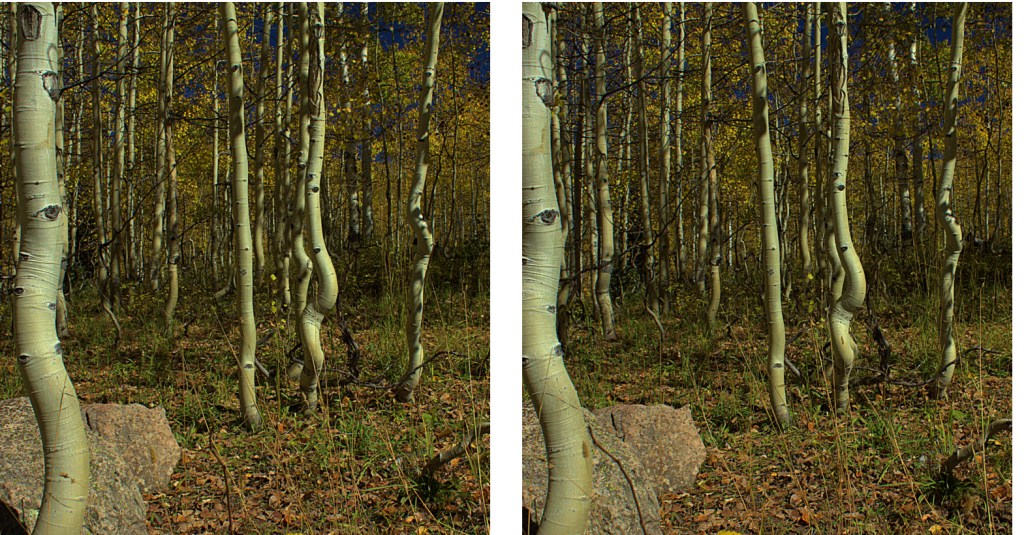
Next I wanted to view them on a computer screen. It was annoying to take two separate prints and put them side by side and try to view them in 3D. Back in the late 90’s I purchased a photofinishing program called Picture Window by Digital Light and Color. It had a feature that would combine the two images for you. It can either put them side by side or merge them into a single image that can be viewed with colored glasses (called an anaglyph). It can even let you adjust the image either vertically or horizontally to align the images for best viewing. The anaglyph can be in black and white (for the most effective 3D image) or a full color anaglyph but sometimes the 3D is a little difficult due to green grass or trees being seen through red filters and cyan filters. Here is an example of the image above as an anaglyph, both black and white and color.


(Full disclosure: the images were not level. I had to rotate the right image a little to get them level. The most recent release of Picture Window Pro 8 has this feature built in.)
By adjusting the image horizontally, you can increase or decrease the depth of the image. An example would be the tree on the left can be even with the surface of the print or computer screen or it can be quite a ways in front of the page. If you look closely at this tree, it has a red halo on the right side of the trunk. The other trees have the red halo on their left side. If the red trunk is on the right, the tree will appear above the print or screen. If you move the red image too far, you almost have to be cross-eyed to see it. I have found that the closest subject in the frame cannot appear to be more than an inch above the page or print but can be two or three inches in front of a computer screen (even farther if viewed on a television).
How to View 3D Images
Now that we know how to take the images, how do we view them? We will leave the anaglyphs for later because all you would need then are the right glasses. The most effective way with a print, on a printed page or a small computer screen is to have the two images about 2 ½ inches apart (left corner to left corner, center to center, etc.). I find the optimum distance from my nose to the images is about 16 inches. Reading glasses can help, especially if you have trouble focusing that close (like me). Now you have to look at the left image with your left eye and the right image with your right eye. Some people can do this easily, others have difficulty. A good first way is to look at something far away and keep your eyes focused on it. Slowly move the page or computer up until the image is covering what you are looking at. Avoid focusing on the image because you want to see three blurry images in front of you. When you do, you are ready to concentrate on the center image. It will be the one in 3D and should be clearly showing depth. Concentrate on it and try to focus on it without losing the depth. Sometimes holding a piece of paper in front of your nose to block one eye from seeing the opposite image can help. Also, try it without reading glasses and then while seeing the three images, slip the reading glasses on. It may take a lot of practice but I have been able to do it instantly no matter how far apart or large the images are, up to 4 inches apart.
They make viewers for prints that are presented as a stereo pair. Such as the ones above. This viewer is for viewing three dimensional images on your smart phone.

For the anaglyphs, 3D glasses are fairly cheap and can be purchased in bulk for as little as $.18 each. A web search can show you several sellers.

You can even make your own but you will need a red filter and a cyan filter. Green or blue can be substituted for cyan but it leaves an annoying halo around subjects in the image. I always put red on the left (years ago I did the opposite but found red on the left works best for right eye dominant people like me since cyan is a combination of two of the three primary colors). If they still sell them, the old colored plastic sleeves for school reports worked well. Layering the green and blue (which is really what cyan is) can work but you may have to layer the red with more red to get the right balance, because of the darker image. In this online ordering culture, I expect many people will opt for ordering them. I am not the only nerd who still does anaglyph 3D images and videos.
How to Assemble 3D Images
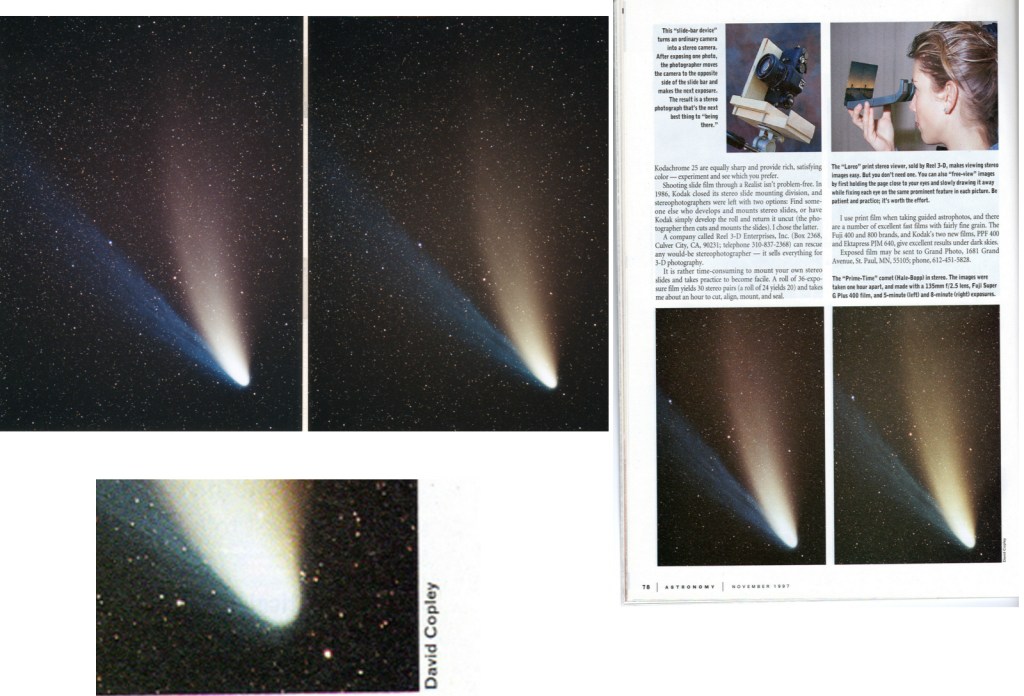
Astrophotography in 3D is a challenge. My first effort was on Comet Hyakutake back in 1996.

It didn’t turn out as well as I had hoped but it prepared me for the next bright comet, Hale-Bopp. It turned out so well that Astronomy Magazine published it in their November 1997 issue.
This encouraged me to really delve into all aspects of stereo imaging.
We will assume you have taken a few images that you want to see in 3D. If you have two prints, you can do what I did for the images of the comets above. Cut and tape!

Back in the day, when you got your pictures back from the photofinisher, you had two, 3 1/2 x 5’s or 4×6’s and had to tape them together. Remembering that the centers need to be no more than 2 1/2 inches apart. With digital prints, you should have some kind of an image editor in your computer. Some programs will let you pair two together into one frame, such as a “layout” feature. Here is a screen shot of Picture Window’s layout feature.

Now all you need is a viewer or reading glasses as described above. These are actually the highest quality for viewing. You get the best resolution with a stereo pair. Here is a screen shot of PW8’s (Picture Window Eight’s) program creating a side-by-side stereo pair. Again, it helps you align the vertical, horizontal and rotational aspects for the best viewing.

For best viewing on a screen, anaglyphs are the best. You will need to view the images with glasses, though. The advantage here is it does not matter if the screen is a small smart phone or a large theater screen, everyone can see the stereo image. This screen shot shows PW8’s method of creating anaglyphs (it can do both black and white or color anaglyphs).

How to Take Stereo Astrophotos
As you have probably already guessed, my favorites are astrophotos in 3D. But how do you create your parallax for something that is thousands of miles to hundreds of lightyears away? Within the solar system, it is usually time and how your subject moves over time that gives you your parallax. The easiest are things that rotate. A sphere that rotates gives you a nice parallax after it rotates no more than about ten degrees. Jupiter does this in about 15 minutes. I like to give Jupiter only about eight to ten minutes. It makes Jupiter look like it is a ball about two feet away. For Mars it is about 25 minutes. For the Moon it is Earth that is rotating so a wait of 24 minutes would be right. Although, the Moon is rotating in relation to the Sun, so the terminator is moving at about 187 miles per hour (if my calculations are correct). During that 24 minutes, it has moved about 75 miles. For wide views of the Moon, 24 minutes works but if you use higher magnification, 10 to 15 minutes is sufficient. This example is a wait of about 20 minutes.
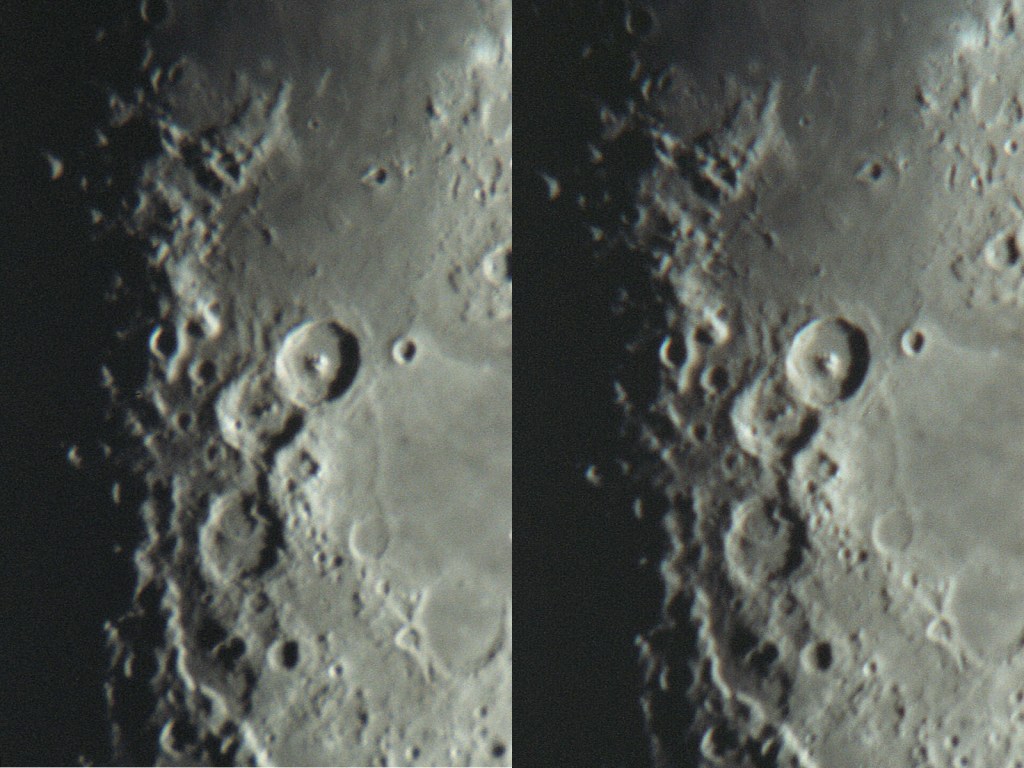

If you look closely at the terminator, about half way down, you can see some mountains near a bright crater come into view in the right image. The stereo image shows how high the crater rims are in relation to the surrounding mountains and plains. You can also see the Moon’s curvature.
Jupiter needs a good pair of images to begin with. A good telescope and imager are a must (I use either an 8 or 10 inch Newtonian. I prefer the 8 inch as it has a longer focal length). My DSLR works well but there are many cameras made specifically for astrophotography. I take a video that is at least one minute long. I like to have more than 2500 frames and then use a stacking program (like Autostakkert or RegiStax to stack the images). The following images are stacks of 2,000 to 2,000 images (video frames).
Each final image was combined in PW for a stereo pair or anaglyph and were taken about eight minutes apart.
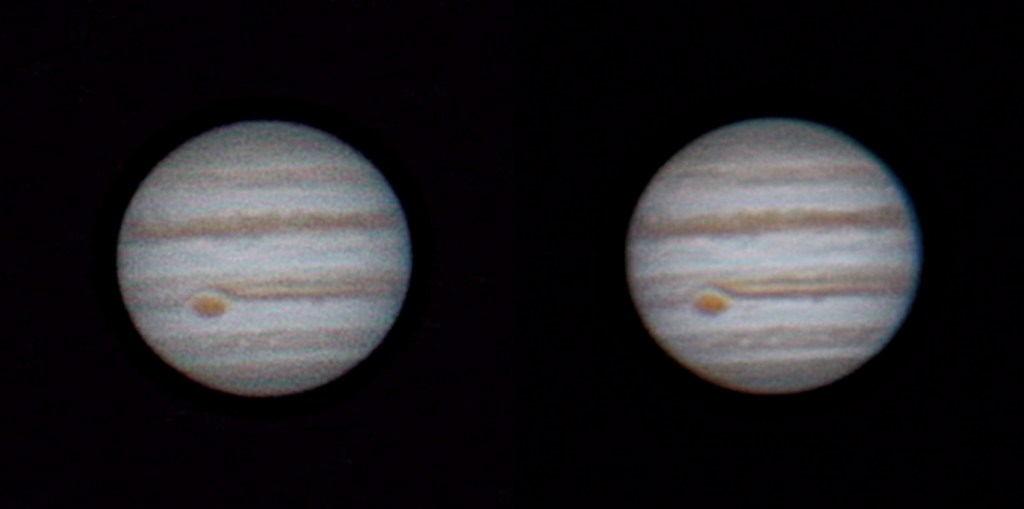
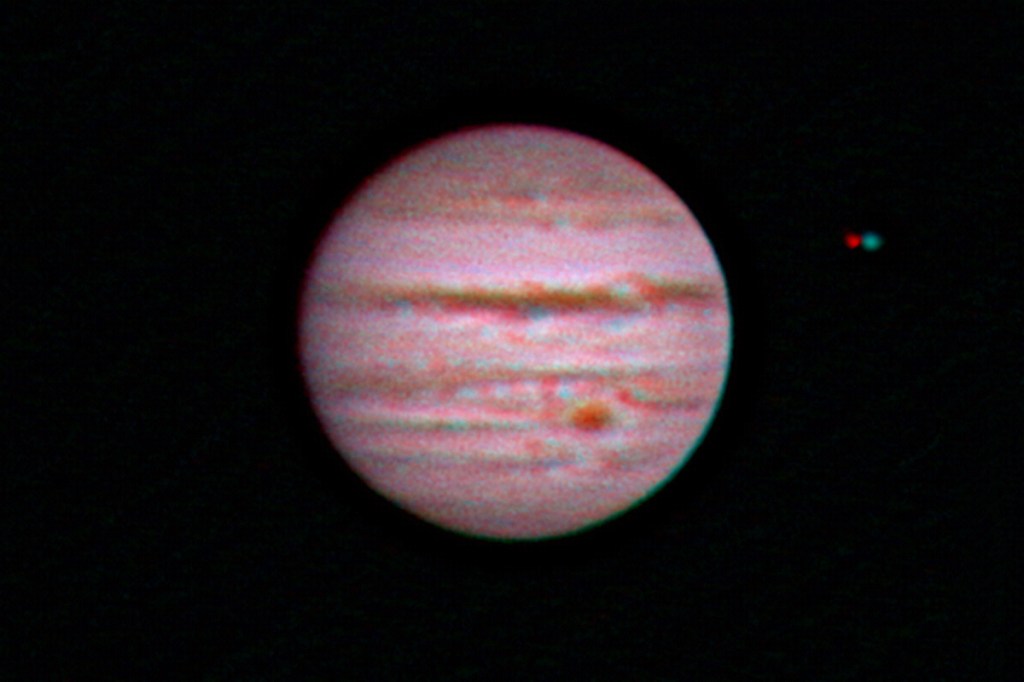
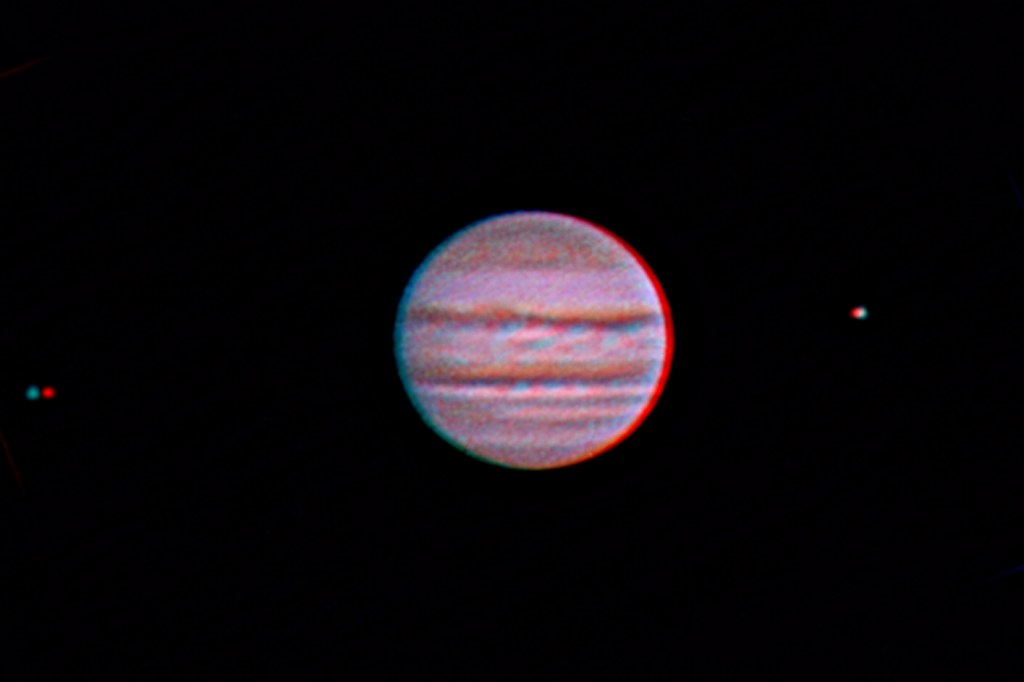
I consider this art and not “scientifically accurate.” Jupiter’s satellites (or moons) are moving and not going to give you an accurate idea of their distance in front of or behind Jupiter. I like to “clone” one of the images of the satellite (either right or left image) farther apart than it appears to give it a more accurate look. In the last image, Europa is on the left and it’s original parallax was minimal, making it look like it was at the same distance as Jupiter. I moved the red image of it more to the right which makes it appear to be in front of Jupiter (which it was). Same with Io except the reverse since it was in the process of moving behind Jupiter. Also, all three images above were taken on different days so more of Jupiter can be seen.
Mars is harder since it appears far smaller in a telescope. Getting good images are a challenge and it is a must to catch it during opposition as this was on Nov. 30, 2022.
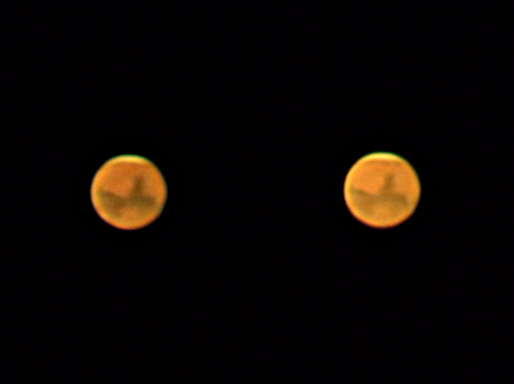
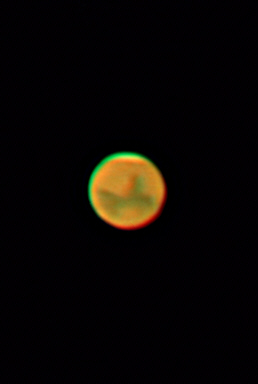
These images were taken 18 minutes apart. I didn’t have any good ones farther apart in time. The atmosphere was not cooperating. Moisture was moving in. This isn’t easy folks!
The comet photos are usually an hour apart. You want either Earth or the comet to move in-between images. For comet Hale-Bopp here, it was about 50 minutes.


Comets will sometimes have a blue tail which is ionized gas. The blue does not allow nice color anaglyphs so a black and white one shows far more detail.
Pluto requires a day in-between images. The stereo pair has an arrow to show Pluto, the color anaglyph does not.


The stereo pair are slightly rotated and shows the stars at a slant. I did not correct this on purpose to show the importance of alignment. In the anaglyph, Pluto appears a couple inches above the stars. Also, dust on the original will show up as a cyan or red colored dot, seen here as a red “star” in the upper left.
Creating Astrophoto Art
How about subjects that are light years away? For these images, I used the clone feature in PW to move stars and nebulosity to give the appearance of depth. I found the distances to the nearer stars and calculated just how much to move them to show their relation to the nebula. All of these took many hours to complete. for the last one I will describe how I did it. Some will only be shown here as anaglyphs.
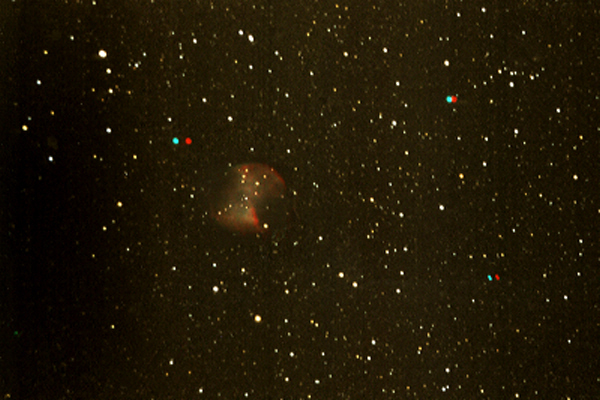
M27, The Dumbbell nebula.
M8, The Lagoon nebula.
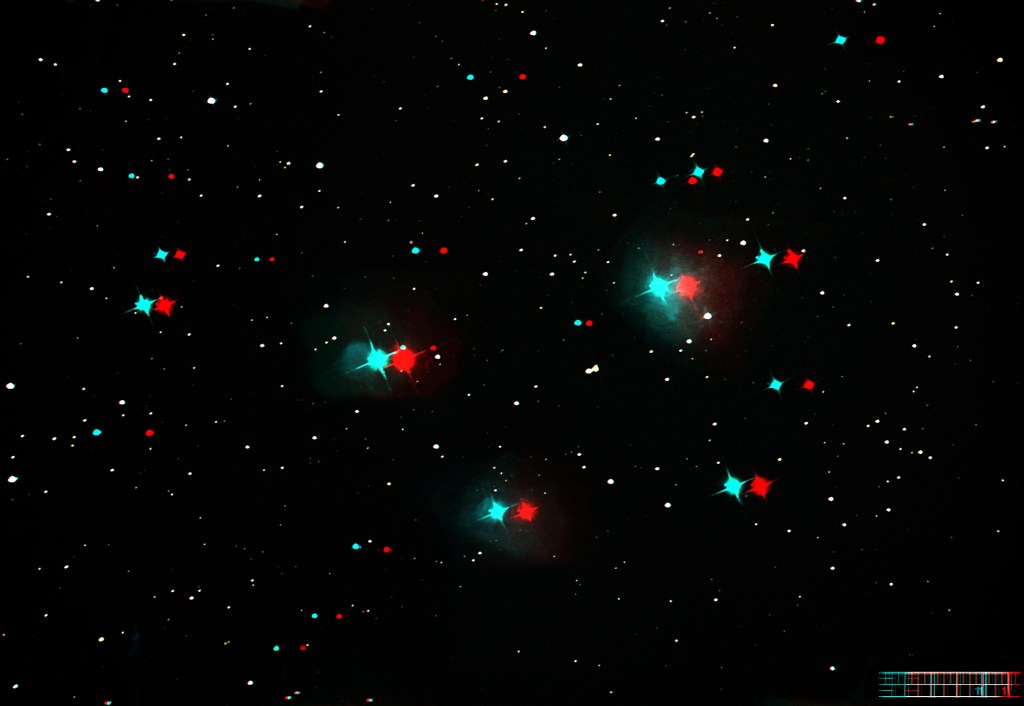
M45, The Pleiades. I left the ruler I used to calculate the distance to move elements for accurate depth.

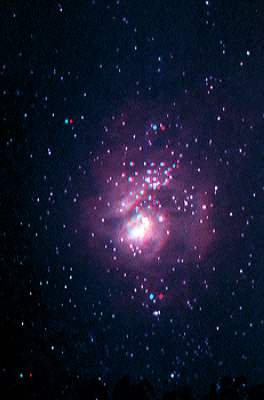
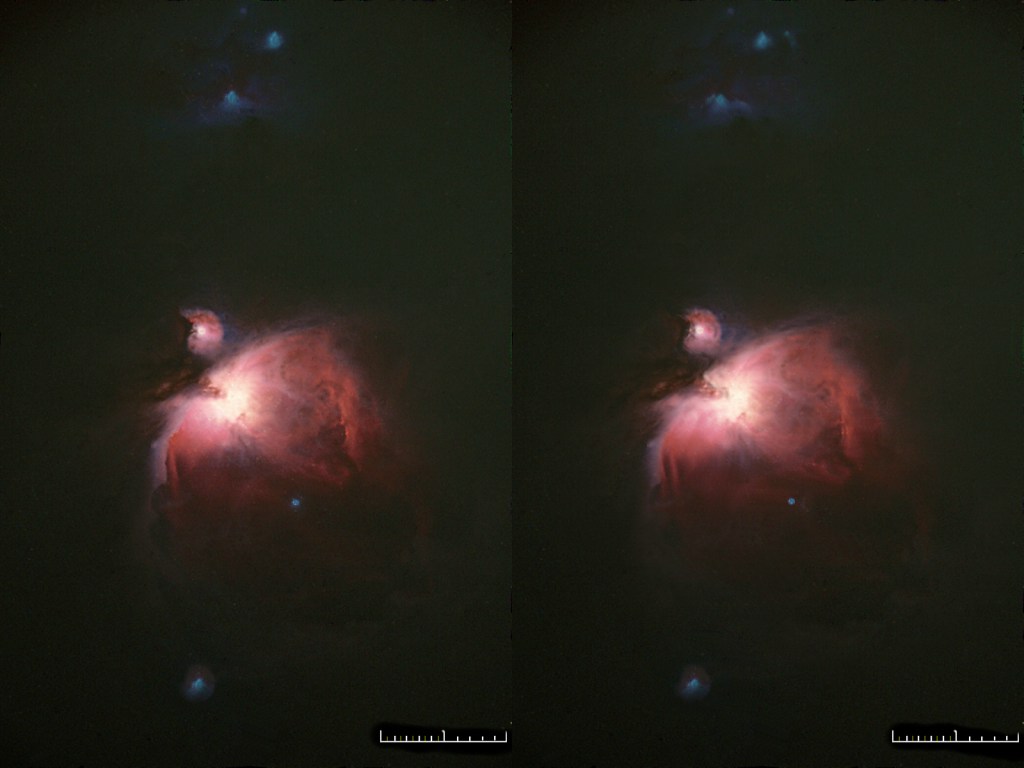
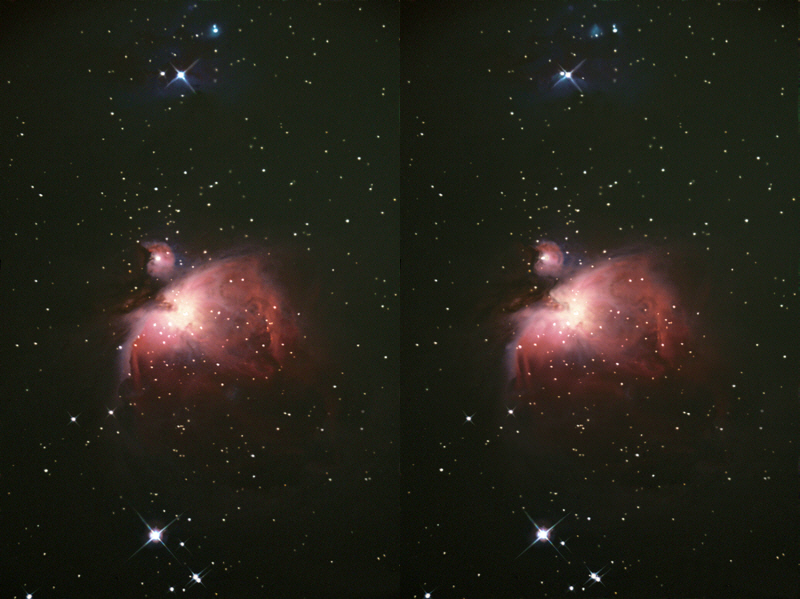
M42, The Orion Nebula. B&W anaglyph.

The Orion nebula again. This one took weeks. Below I will show the images I used to complete this difficult project. First I separated the stars and the nebulosity. Then I did the cloning, then combined the final results. Again, I left the rulers I used for accurate placement of the stars.


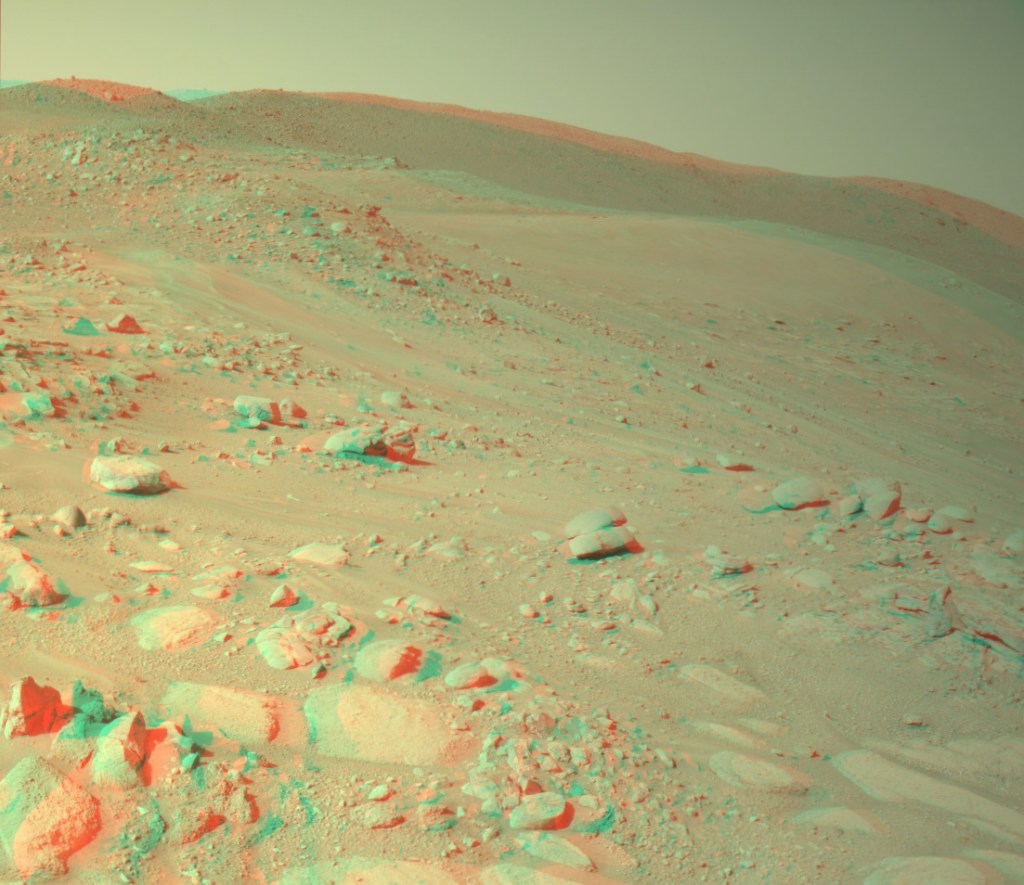
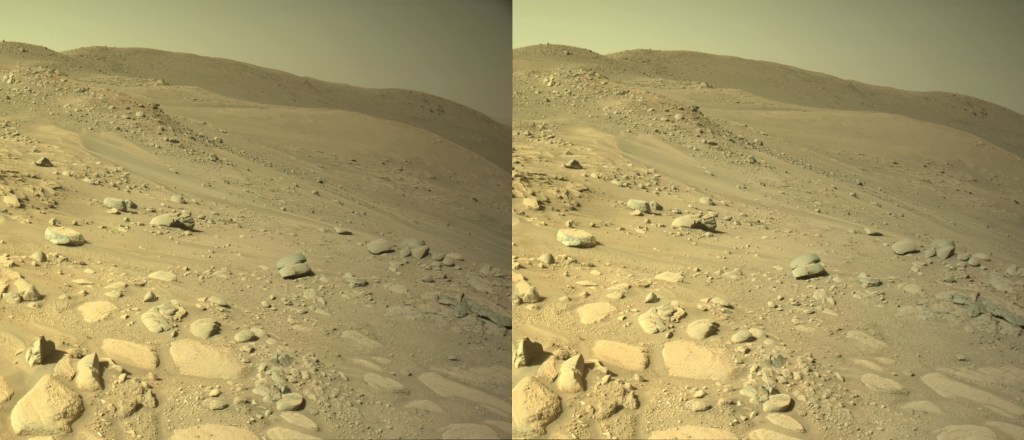
I also like to download images off of NASA’s website and create my own stereo views. NASA does allow you to post their images as long as you give them credit and don’t make money from them. Since I don’t make money off of this site…


I hope you have enjoyed learning how to create three dimensional images.
